
Preventing Common Barcode Printing Mistakes for Clearer Scans
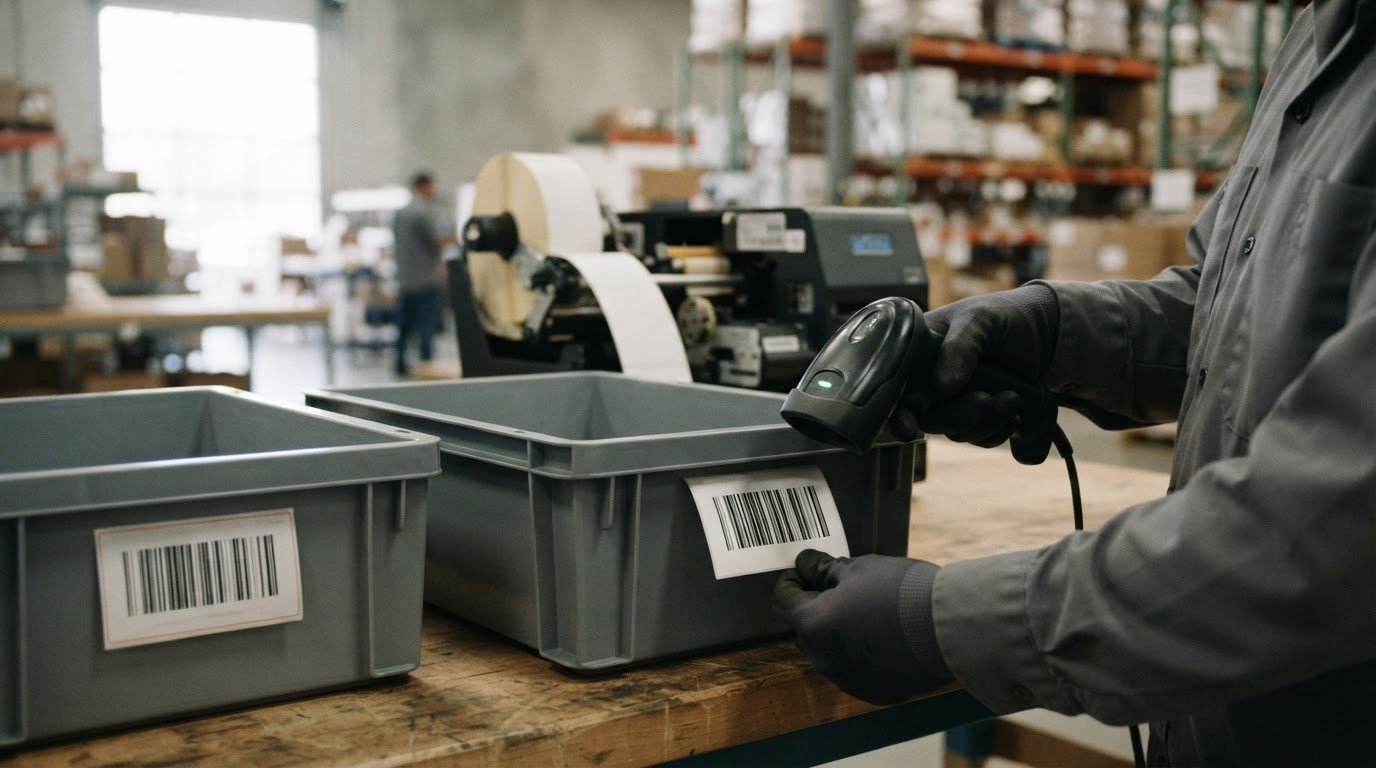
A barcode may look clean in print yet be difficult to scan if the label material does not suit its environment. Preventing common barcode printing mistakes starts with matching the label and adhesive to the product’s temperature and moisture conditions. Heat, light and friction can also fade direct thermal labels over time, while transparent or semi-transparent surfaces can interfere with scanning.
It is easy to focus on the printer, but reliable scans depend on several details working together. Barcode size, resolution, colour contrast, quiet zones and symbology all matter. A test print can reveal problems before you produce labels in volume.
This guide explains how to choose suitable label materials, produce clear prints and preserve space around the barcode. It also covers barcode types and practical testing to help you spot readability issues before they slow scanning or disrupt inventory work.
Key Takeaways
- Choose label material and adhesive to suit the product’s temperature, moisture and handling conditions.
- Keep barcode proportions and required size intact; higher print resolution alone won’t correct a barcode that’s been stretched or reduced too far.
- Use strong contrast and avoid colours or backgrounds that can make the bars harder for scanners to distinguish.
- Select a barcode symbology that fits the product or process, and leave a clear quiet zone around the symbol.
- Test sample labels and verify print quality before producing a batch, so readability issues can be caught early.
1. Does Print Resolution Actually Affect Whether a Barcode Scans?
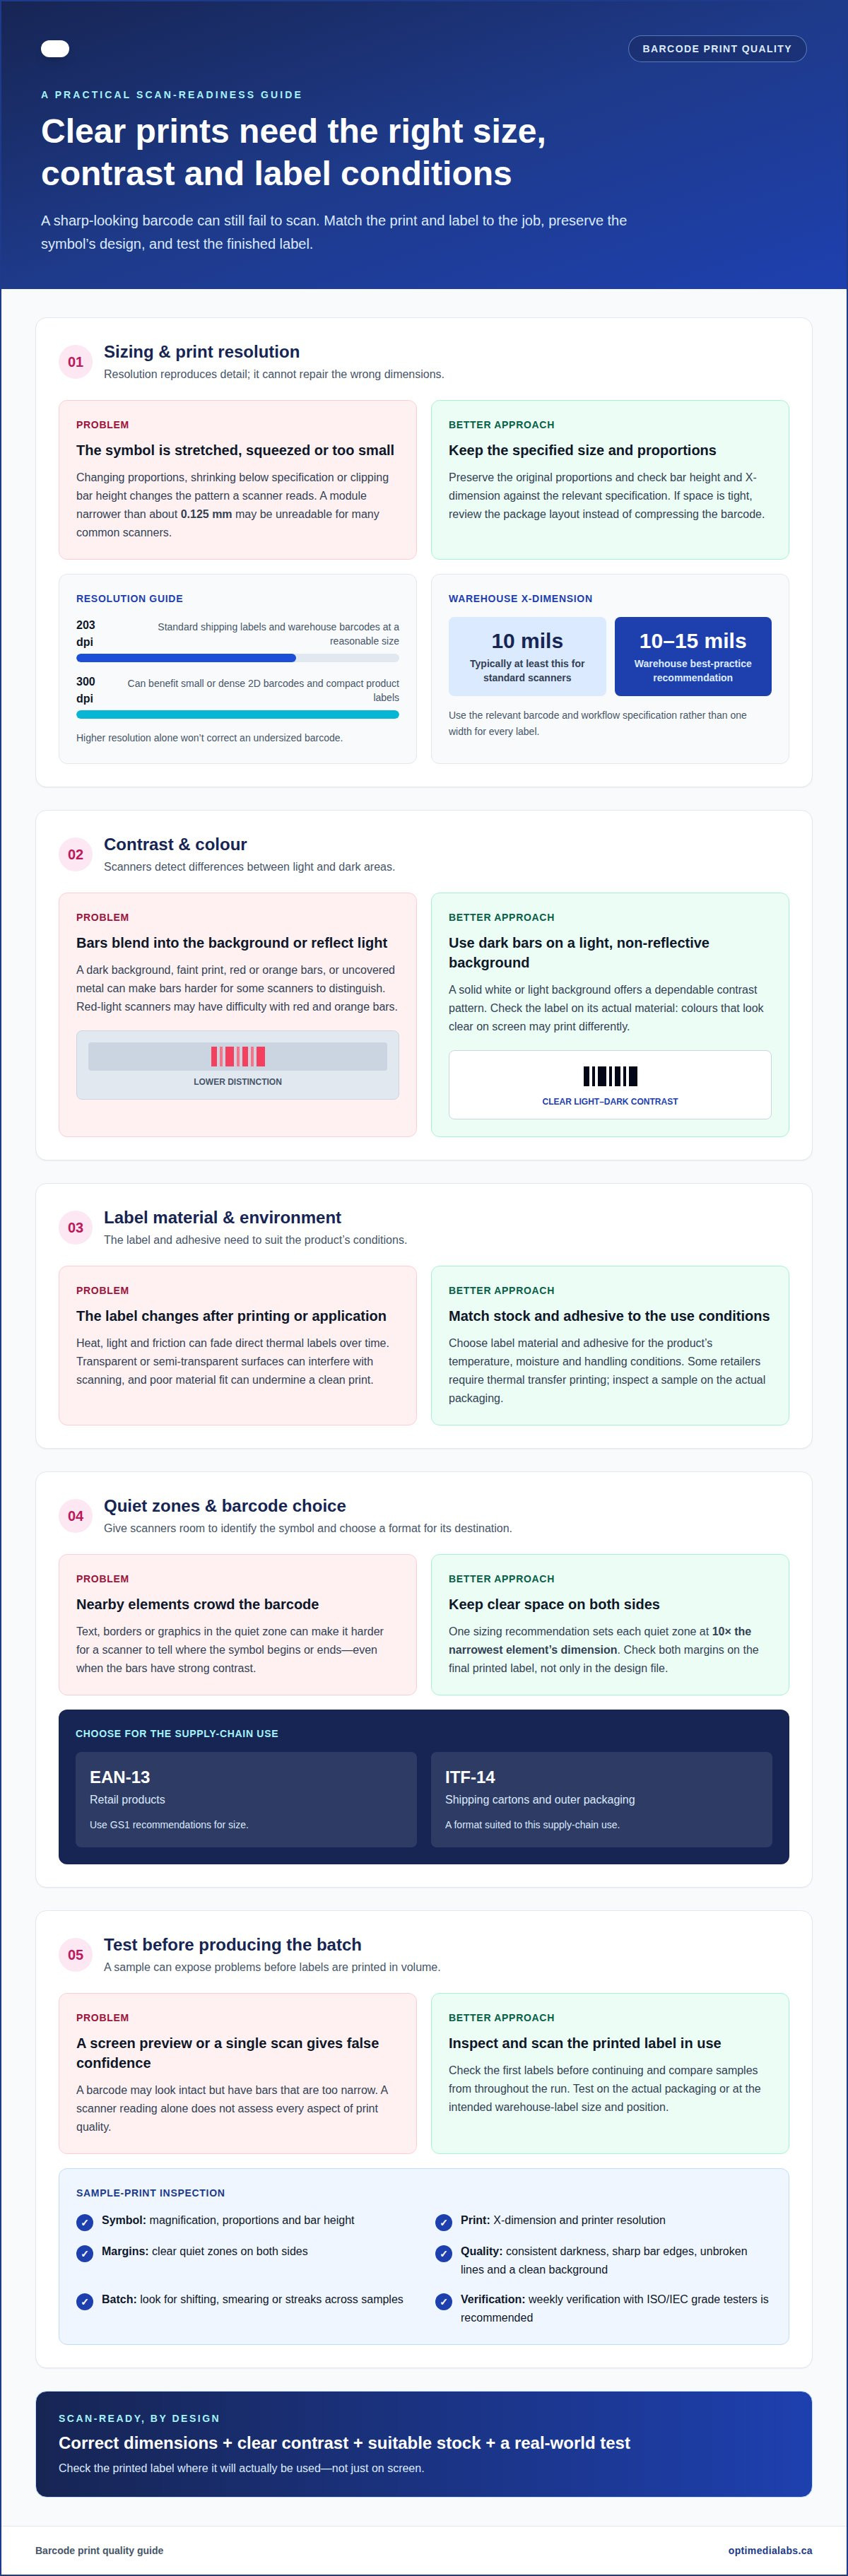
Yes. Resolution affects how accurately a printer reproduces narrow bars and spaces, but it cannot fix incorrect sizing or proportions. A barcode module narrower than about 0.125 mm may be unreadable for many common scanners. For Canadian retail products, use GS1 recommendations for EAN-13 size; shipping cartons commonly use ITF-14. These are practical format and size considerations, not a complete statement of Canadian legal requirements.
Common printing mistakes include stretching or squeezing the image, shrinking it below its specified size, clipping its height and crowding its quiet zones. Each can change the pattern a scanner reads. The European Union identifies a barcode’s overall size and shape as important to readability, including when a label is damaged. Preserve the original proportions when resizing, and check the printed result rather than assuming a sharp-looking image will scan.
Don’t reduce a UPC simply to fit a tight packaging layout. If the label space is limited, review the layout and barcode specification before printing instead of compressing the symbol. A barcode that looks intact to the eye may have bars too narrow for a scanner.
Resolution should match the barcode’s density and printed size. A 203 dpi printer can reliably print standard shipping labels and warehouse barcodes at a reasonable size. A 300 dpi printer can benefit small or dense 2D barcodes and compact product labels, where finer detail matters. Choosing higher resolution alone won’t correct an undersized barcode; the module width still needs to suit the scanner and application.
For warehouse use, X-dimensions are typically at least 10 mils for standard scanners; warehouse best practices recommend 10-15 mils. Use the relevant specification for the barcode and workflow rather than applying one width to every label. EAN-13 should stay within the size range recommended by GS1. Its height also matters: shortening the bars to fit packaging can reduce reliable scanning, so check the required height before changing the artwork.
Leave clear space beside the bars, too. One sizing recommendation sets each quiet zone at ten times the narrowest element’s dimension. Text, borders or nearby graphics can intrude on that margin and make it harder for a scanner to identify where the symbol begins or ends. Check both sides on the final label, not just in the design file.
Before a print run, compare a sample with the intended specification. Confirm magnification, proportions, bar height, X-dimension, quiet zones and printer resolution. Then scan the printed label in its actual use position. For product packaging, inspect the barcode after applying it to the surface. For a warehouse label, test it at its intended size. These checks help distinguish a resolution issue from an incorrect layout or size.
2. How Does Poor Contrast Cause Scan Failures?
Barcode scanners detect differences between light and dark areas; they don’t interpret bars as people do. Dark bars on a solid white or light background offer a dependable contrast pattern. If the background is too dark, the print is too light, or both, contrast can fail under GS1 barcode verification guidelines. The bars may look visible to an employee but still be difficult for a scanner to distinguish.
Choose colour based on how scanners read, not just how the label looks. Red and orange bars can be difficult for some scanners because some use red light. A dark barcode on a light, non-reflective background is usually a safer choice. Avoid placing bars or backgrounds on uncovered metal, where specular reflection can interfere with scanning. Check the label on its actual material, since colours that look clear on screen may print differently.
Reduce smudging, fading, streaks and low contrast by choosing a suitable print method and label material, then inspecting a sample for clean, distinct bars. Direct thermal labels can fade over time with heat, light or friction. Some retailers require thermal transfer printing for this reason. To calibrate a thermal printer, follow its media-calibration procedure after loading or changing label stock, then print and inspect a sample. Clean the printhead according to the printer’s instructions, and adjust darkness if bars look faint or run together.
For a print batch, inspect the first labels before continuing and compare samples from throughout the run. Look for consistent darkness, sharp bar edges, unbroken lines and a clean background. Check that labels have not shifted, smeared or developed streaks. Barcode verification can catch print defects before labels ship in volume; weekly verification with ISO/IEC grade testers is also recommended. A scanner reading alone does not assess every aspect of print quality.
Keep the quiet zone clear during both design and production. Text, borders and graphics crowding the barcode can make it harder to identify, even when the bars have strong contrast. Check the printed label for nearby elements, then scan it under the lighting and on the surface where it will be used. For example, test the label on its packaging instead of relying only on a screen preview.
If contrast problems persist across samples, review the printer setup, ribbon or print method, and label material as a system. Discuss your barcode print setup when you need help identifying a suitable configuration.
3. Choosing an industry-appropriate barcode symbology
A barcode symbology defines how data is encoded in a symbol. The appropriate choice depends on where the label will be used, what information it must carry, and which scanners or systems must read it. EAN-13 is used on retail products, while ITF-14 is used on shipping cartons and outer packaging. These examples illustrate different supply-chain uses, not one universal barcode for every inventory task.
Start with the destination. For a retail product, consider whether EAN-13 fits the labelling process and the requirements of the retailer or system receiving product data. For an outer carton, ITF-14 may suit shipping and handling workflows. A symbol that works for a product label may not be the appropriate choice for a carton, because those labels serve different points in the supply chain.
Patient identification armbands need a separate decision. The available guidance recommends printing these barcodes in Code 128 rather than Code 39. Apply the specified format consistently to the armband and the connected identification process. A different symbology can encode information in a way that the intended workflow does not expect, creating a mismatch even if the printed bars appear clear.
Before generating labels, document the required symbology, encoded data, label destination, and scanning workflow. Then confirm the barcode type in the software before producing artwork. For example, don’t substitute ITF-14 for an EAN-13 retail symbol simply because both are familiar formats. Using the wrong symbology can produce unreadable or inaccurate data, disrupting product traceability and supply-chain efficiency.
Surface and placement affect performance, too. Transparent or semi-transparent materials, such as glass or plastic, can lead to poor scanning. Choose suitable label material for the package and place the symbol on a flat area, away from seams, sharp curves and vertical corners. Peeling or creased labels can interfere with reading, so inspect the symbol after application.
Finally, test a sample on the actual package, not only on a flat screen or proof. Scan a retail label on its product and an ITF-14 label on its carton using the intended workflow. Check that the encoded information is interpreted correctly and matches the product record. This catches a symbology or placement mismatch before it affects a wider inventory or shipping run.
4. Preserving barcode quiet zones
Leave a clear quiet zone around every barcode. One guideline calls for at least 1/4 inch of blank space on all sides; another sizing recommendation sets each side at ten times the narrowest element’s dimension. Apply the specification for the barcode and its use, and keep text, borders and graphics outside that area.
White space gives a scanner a clear visual boundary around the symbol. Without it, nearby print can make the barcode’s beginning or end difficult to identify. For example, a product name placed directly beside a retail barcode may intrude into the quiet zone even if it does not overlap the bars. Move the text or reposition the symbol before printing.
Check the full label layout, not just the barcode file. In a packaging design, inspect both sides of the symbol for nearby copy, decorative lines, icons and label edges. A quiet zone that looks open in the artwork can become narrow when the barcode is placed on a small label. Preserve its clear area when resizing or rearranging the design.
Placement matters on the package, too. Avoid positioning a barcode close to a vertical corner or label edge. A label that wraps around a carton corner can distort the surrounding clear space and make the symbol harder to present consistently to a scanner. Choose a flat, accessible panel, then inspect the applied label for folds, seams and nearby printed marks.
For curved products, consider how the label sits after application. A barcode on a narrow bottle or rounded container may bend around the surface, affecting its shape and available white space. Place it where the symbol can lie as flat as the package allows. On cartons, keep the quiet zone clear even when other shipping information shares the panel.
Use a practical pre-print check: view the finished label at its actual size, confirm the required quiet zone on every side, and look for anything intruding into the blank area. Then apply a sample to the intended package and inspect it from edge to edge. This can catch placement errors that a design preview alone misses.
Don’t solve a tight layout by shrinking the quiet zone without checking the applicable barcode specification. GS1 recommendations provide guidance for EAN-13 and ITF-14 printing, and the symbol’s required clear space should be considered alongside its size and placement. A readable barcode needs an uncluttered perimeter as well as accurately printed bars.
5. Barcode testing before bulk printing
Preventing common barcode printing mistakes means treating a sample as a production check, not just a design preview. Print a label using the intended printer setup and material, apply it to the actual package, then test it in the workflow that will scan it. This can expose issues related to the finished label, including the effects of its surface, placement or handling.
Check both the scan and the data it returns. A scanner may read all 13 digits correctly while a retailer’s system rejects the product record. Compare the decoded value with the intended product information, then confirm that the receiving system identifies the correct item. This separates a printing fault from a mismatch in product data.
Use barcode verification before approving volume production. An ISO/IEC grade tester assesses print quality, while a scan through the intended device shows whether the barcode reads in the operational workflow. Weekly verification with ISO/IEC grade testers is recommended. For a new or revised label, test a sample before release and inspect labels during the run for changes in print quality.
Test the label under its expected conditions. A product moving through refrigeration, transit and shelf handling may encounter different surfaces and wear than a sample kept at a desk. Apply the barcode label to representative packaging, expose it to relevant handling conditions, then scan and inspect it. Look for damage or changes that could affect how the symbol reads.
Record test results alongside the barcode data, material, package type and printer setup. A repeatable record helps prevent common barcode printing mistakes by making it easier to trace problems to specific changes. Review print-ready artwork for colour mode, bleed, legible details within safe zones, black setup and a clean barcode. If any of these elements changes, test the revised output before production.
Unreadable labels can require manual code entry, slow processing and lead to incorrect stock selection. Reprints also use additional labels and staff time. Sample testing and verification can catch defects before a large batch moves through the supply chain. Make approval a defined step before labels are applied or shipped.
Build a consistent testing process for new or revised barcode labels. Contact OptiMediaLabs Canada about barcode printing to discuss equipment or supplies for your workflow.
OptiMediaLabs Canada
OptiMediaLabs Canada offers printing equipment and supplies that can support a more consistent barcode workflow. If test labels show that your current setup isn’t producing clear, readable results, review the printer, label material and ribbon together before a bulk run. Its range includes Afinia Color Label Printers, RFID Label Printers, Afinia Label Cutters & Finishers and Thermal Transfer Ribbons. The right combination depends on your label application and production needs, so consider these options when selecting or updating equipment and supplies for barcode printing.
Contact OptiMediaLabs Canada to discuss your barcode printing needs.
Make barcode quality part of your print workflow
Make preventing common barcode printing mistakes part of a repeatable approval process. Keep a controlled copy of approved label artwork and record the printer setup and material used. When packaging, label stock or print settings change, assess the revised label before production. This gives your team a clear reference when investigating later scan issues.
Assign responsibility for approving barcode changes across the teams that create labels, manage product information and receive shipments. A shared process can help catch mismatches before they move through the supply chain. Review your current workflow and identify where to add documented sample approval.
Choose the next step that fits your operation: document the approval process, review your setup or discuss suitable printing equipment and supplies. Contact OptiMediaLabs Canada to discuss your barcode printing needs. A consistent process makes each new label easier to assess and manage.
Frequently Asked Questions
How Do the Wrong Label Materials Affect Barcode Readability?
The wrong label material can make a barcode fade, peel, crease or become difficult to scan in its intended environment. For example, a label exposed to transit friction may wear differently from one kept on indoor shelving. Match the label and adhesive to the package surface and conditions, including moisture and temperature. If a label will be handled repeatedly, inspect an applied sample after handling to see whether the bars remain clear.
Can I make an EAN-13 barcode smaller?
You can adjust an EAN-13 barcode only within the size range recommended by GS1. Don’t compress the artwork to force it onto a package; first reconsider the label layout or the barcode’s placement. A small cosmetic change can narrow the bars and spaces the scanner must distinguish. Check the final printed symbol at its actual size, then test it on the product packaging before approving the design for production.
Does Print Resolution Actually Affect Whether a Barcode Scans?
Yes. Resolution affects how clearly a printer reproduces fine bars and spaces, especially on compact labels or dense symbols. The suitable resolution depends on the barcode’s size and detail: 203 dpi can handle standard shipping and warehouse barcodes at a reasonable size, while 300 dpi can benefit small or dense 2D symbols. More detail won’t rescue distorted artwork, so assess the printed sample rather than relying on the resolution setting alone.
How Does Poor Contrast Cause Scan Failures?
Poor contrast makes it harder for a scanner to distinguish the barcode’s dark bars from its lighter spaces. A pale print on a tinted background, for example, may look legible under office lighting but scan inconsistently elsewhere. Some scanners use red light, so red or orange bars can be difficult to read. Review the printed label under likely scanning conditions, and avoid reflective surfaces that can interfere with scanning.
What Actually Causes a Barcode to Fail at the Scanner?
A scan can fail because of print quality, placement, damage or data that does not match the receiving system. A label might scan successfully yet still point to an incorrect product record. Check what the scanner decodes, then compare that information with the item record and intended use. Also inspect for creases, smudges, peeling edges or obstructions that could interfere when the barcode passes the scanner.
What Happens When a Barcode Is Printed at the Wrong Size?
A barcode printed too small may have narrow elements that the scanner cannot distinguish. One printed too large may not fit the intended label or scanning position. Either issue can cause repeated reads, manual code entry or delays during checkout and inventory handling. Keep the barcode at its specified size for its use, and test a printed sample in the same position and on the same package type used in regular operations.
What's the best colour for a barcode?
Dark bars on a solid white or light background are a dependable choice because they create clear contrast for scanners. Avoid red or orange bars when scanner compatibility is uncertain, since some scanners use red light. Consider the substrate, too: uncovered metal can reflect light in ways that interfere with reading. Check the colour combination on the actual printed label, not just on a digital proof.
Why won't my barcode scan?
Start by checking whether the barcode is clean, flat and unobstructed. Then confirm its size, print quality and surrounding space. If the scanner still fails, try another properly printed sample to help distinguish a label issue from a device or setup issue. If it reads the code but rejects the item, compare the decoded data with the product record. A successful scan does not necessarily mean the record is correct.